自助建站网站公司网络热词2023
安装busybox
参考博客:
使用GDB+QEMU调试Linux内核环境搭建
一文教你如何使用GDB+Qemu调试Linux内核
ubuntu22.04搭建qemu环境测试内核
交叉编译busybox
编译busybox出现Library m is needed, can’t exclude it (yet)的解释
S3C2440 制作最新busybox文件系统
https://www.busybox.net/是官网。
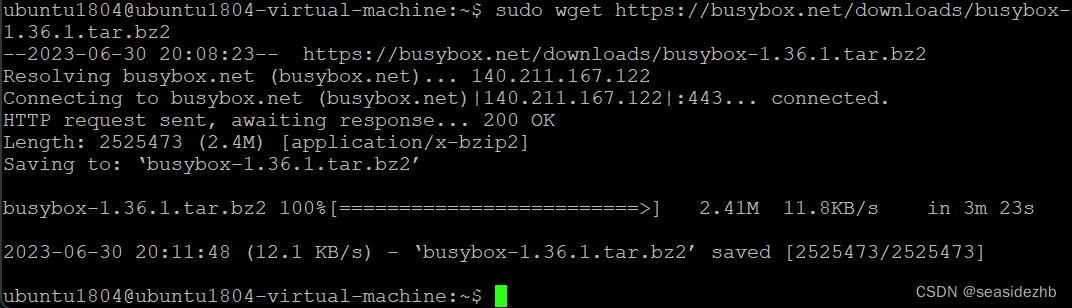
sudo wget https://busybox.net/downloads/busybox-1.36.1.tar.bz2下载源代码。
sudo tar jxvf busybox-1.36.1.tar.bz2解压源文件。

cd busybox-1.36.1进入源代码目录里边。

执行make menuconfig发现报错:
Command 'make' not found, but can be installed with:sudo apt install make
sudo apt install make-guile

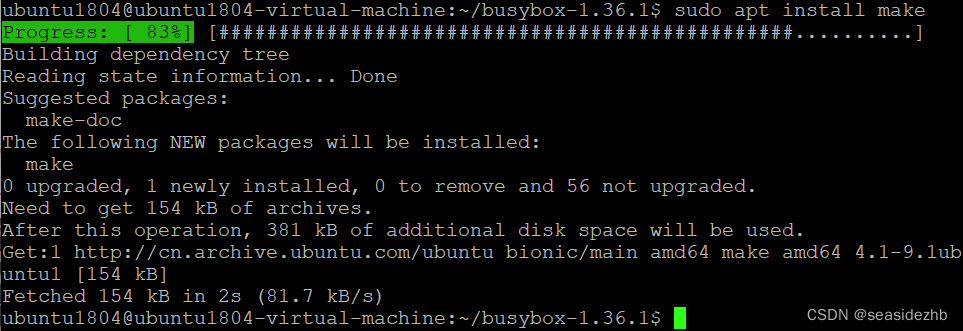
使用sudo apt install make安装make,发现报错如下:
E: Could not get lock /var/lib/dpkg/lock-frontend - open (11: Resource temporarily unavailable)
E: Unable to acquire the dpkg frontend lock (/var/lib/dpkg/lock-frontend), is another process using it?

使用sudo rm -rf /var/lib/dpkg/lock-frontend删除lock-frontend,然后再使用sudo apt install make安装make,发现正常安装。
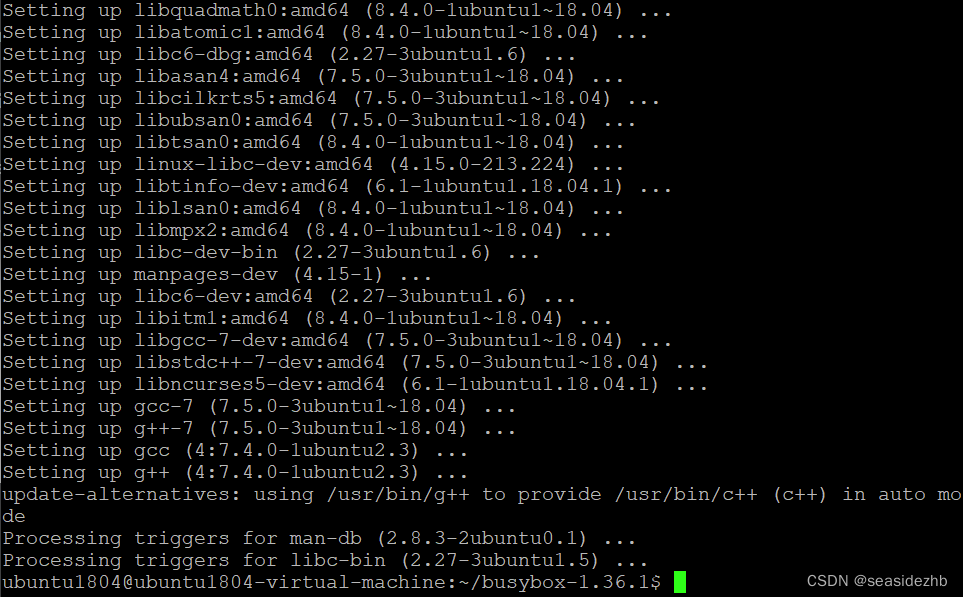
sudo apt install -y gcc g++ libncurses5-dev安装依赖包。
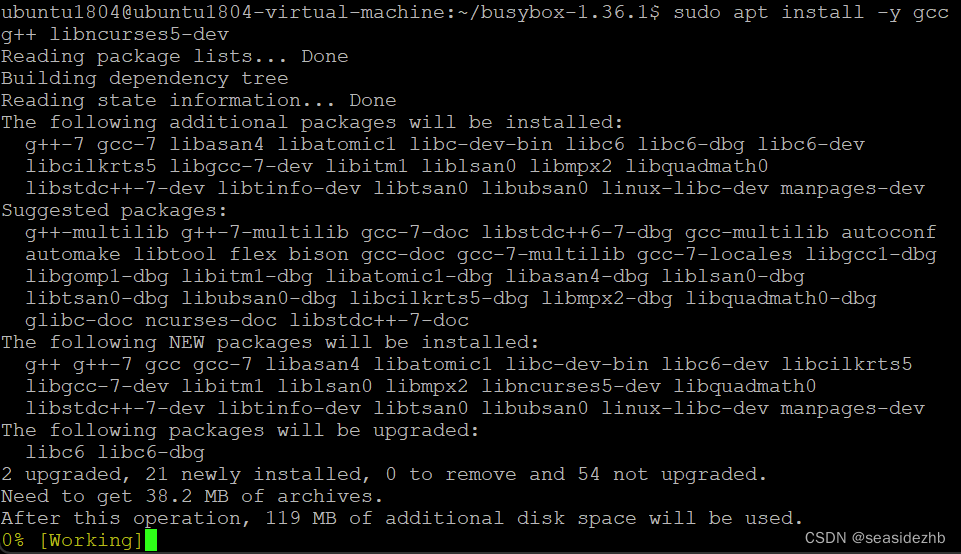
安装完成如下图:
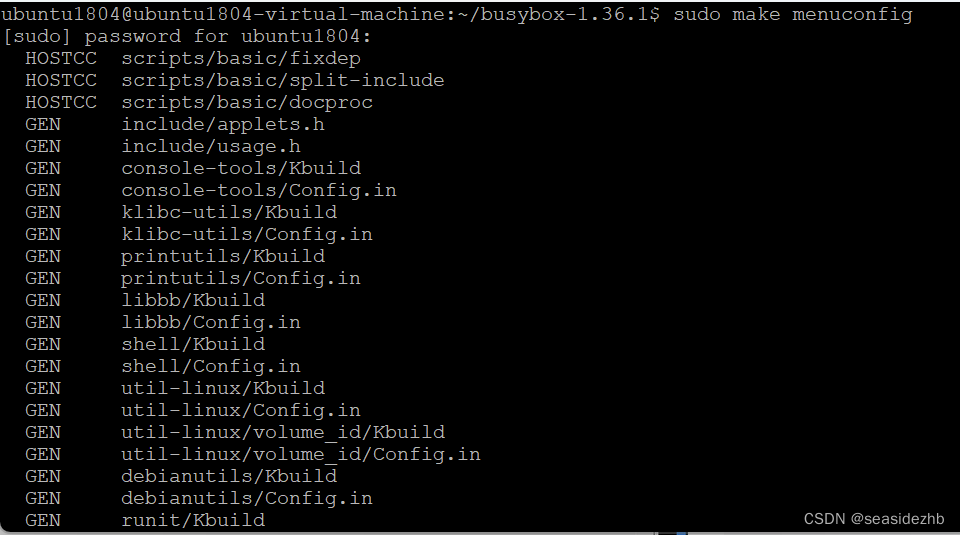
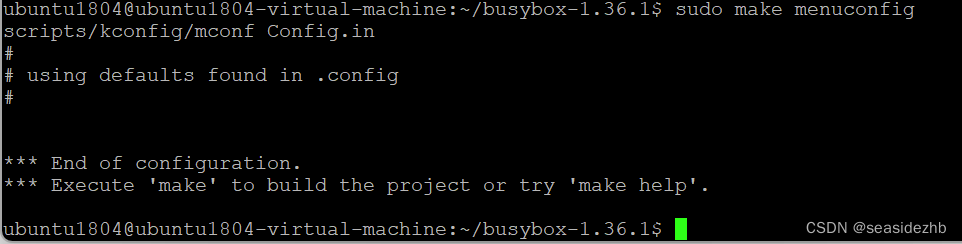
sudo make menuconfig进行配置。
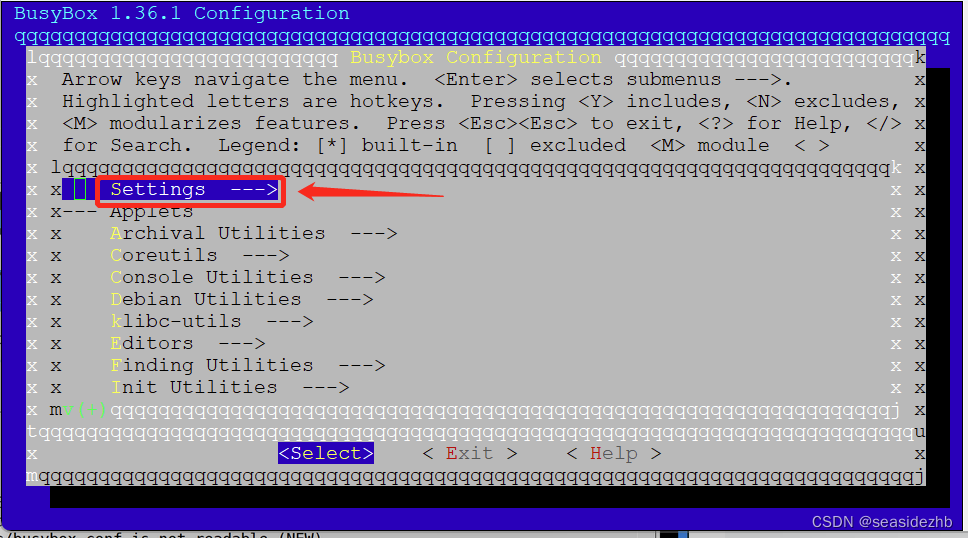
使用上下键可以选择,选择“Setting”之后,按回车键。
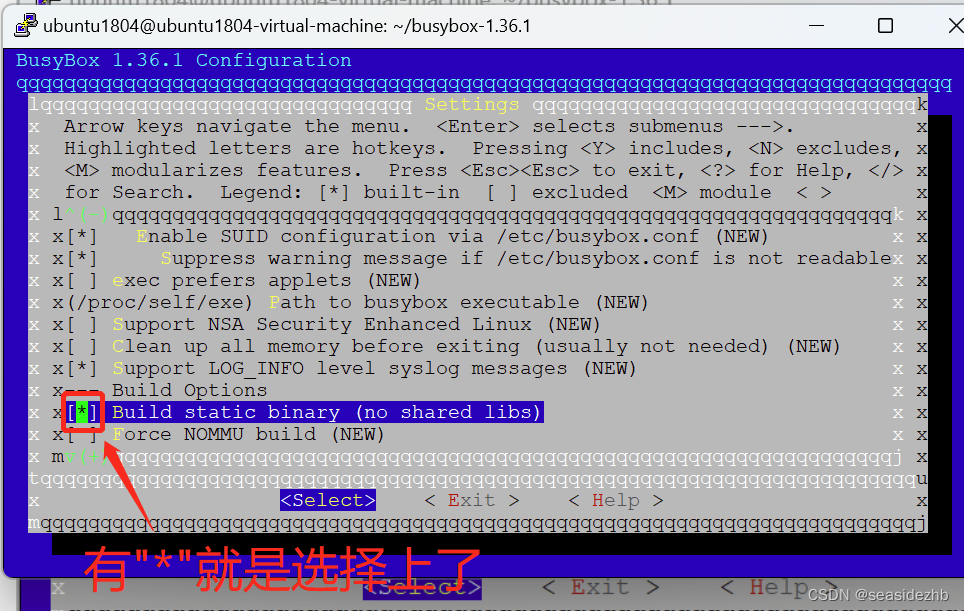
进入到下一个选择时,使用上下键找一下“Build static binary (no shared libs) ”。
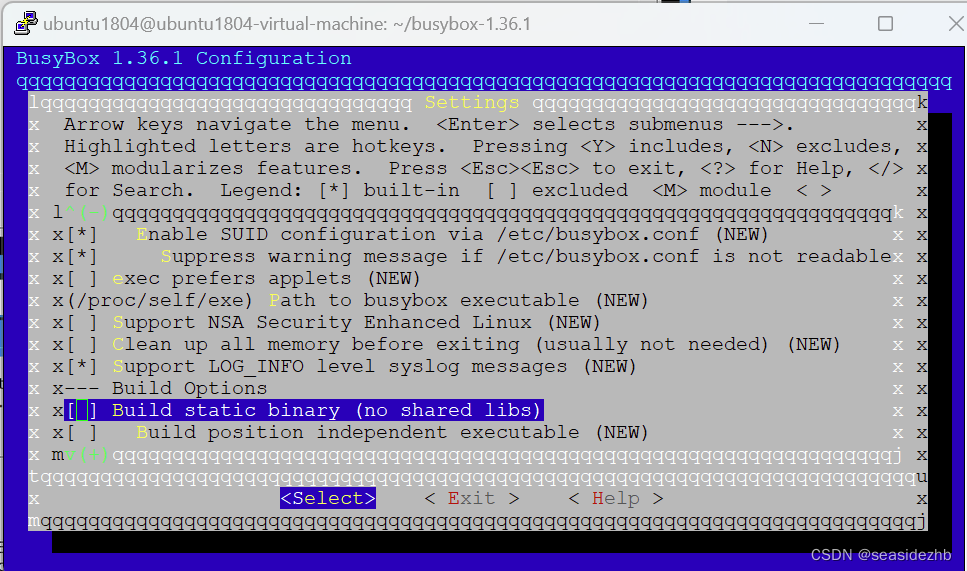
然后按一下y就是选择上了。
按一下Esc键就可以退回到上一层。
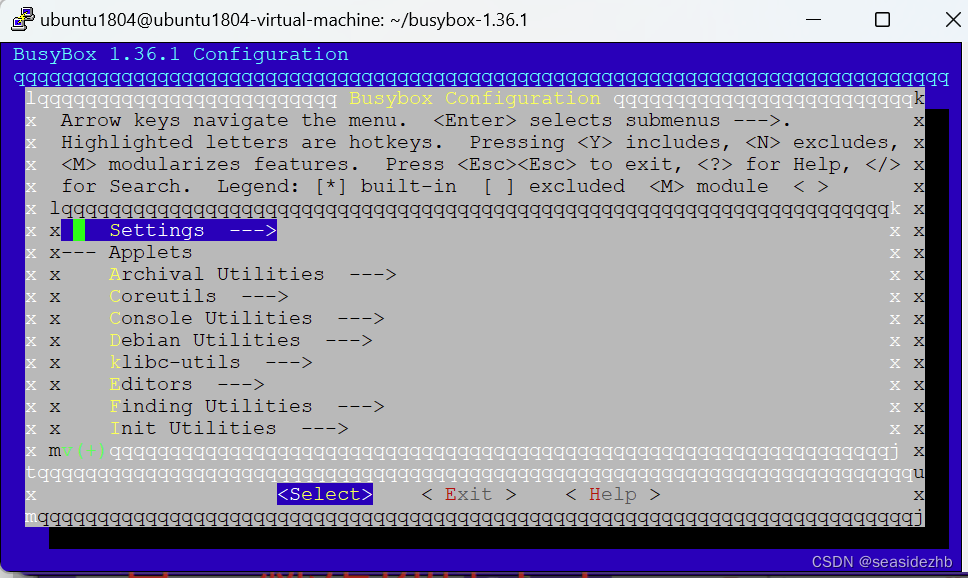
按一下Esc键就可以退回到保存界面。
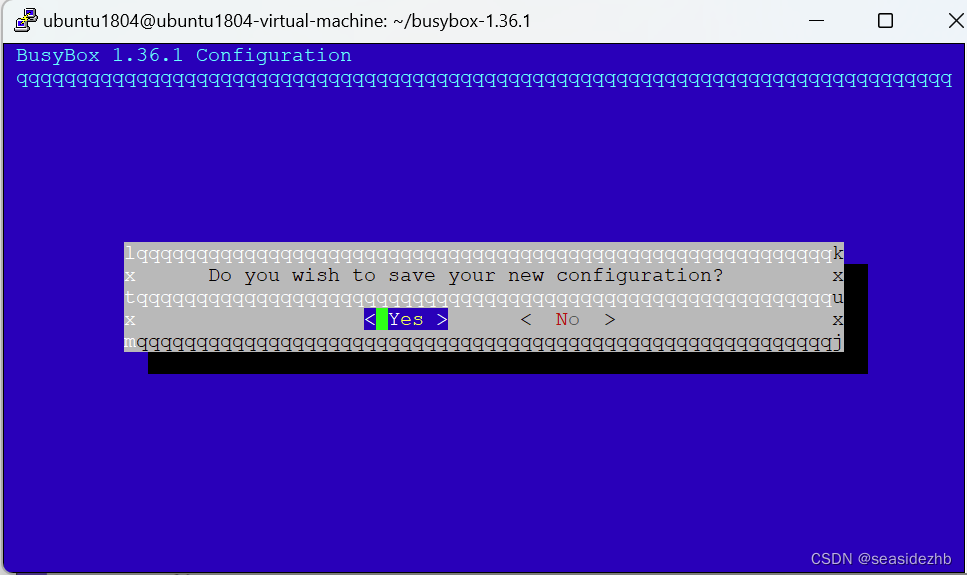
选择“yes”按一下Enter键,就退到原来的命令行下。
sudo make -j2进行编译。
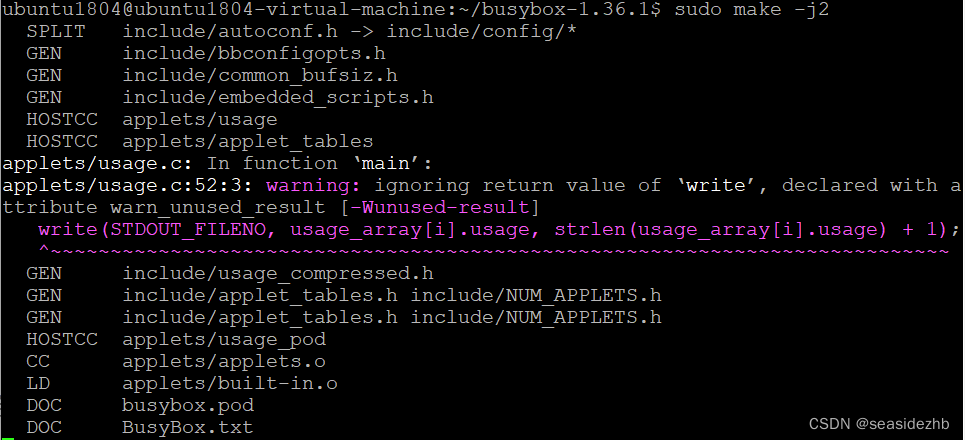
完成之后提示如下:
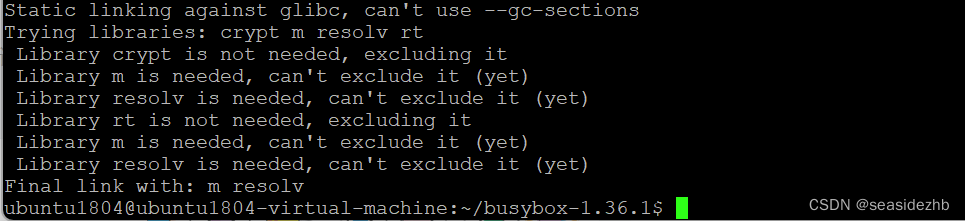
Static linking against glibc, can't use --gc-sections
Trying libraries: crypt m resolv rtLibrary crypt is not needed, excluding itLibrary m is needed, can't exclude it (yet)Library resolv is needed, can't exclude it (yet)Library rt is not needed, excluding itLibrary m is needed, can't exclude it (yet)Library resolv is needed, can't exclude it (yet)
Final link with: m resolv
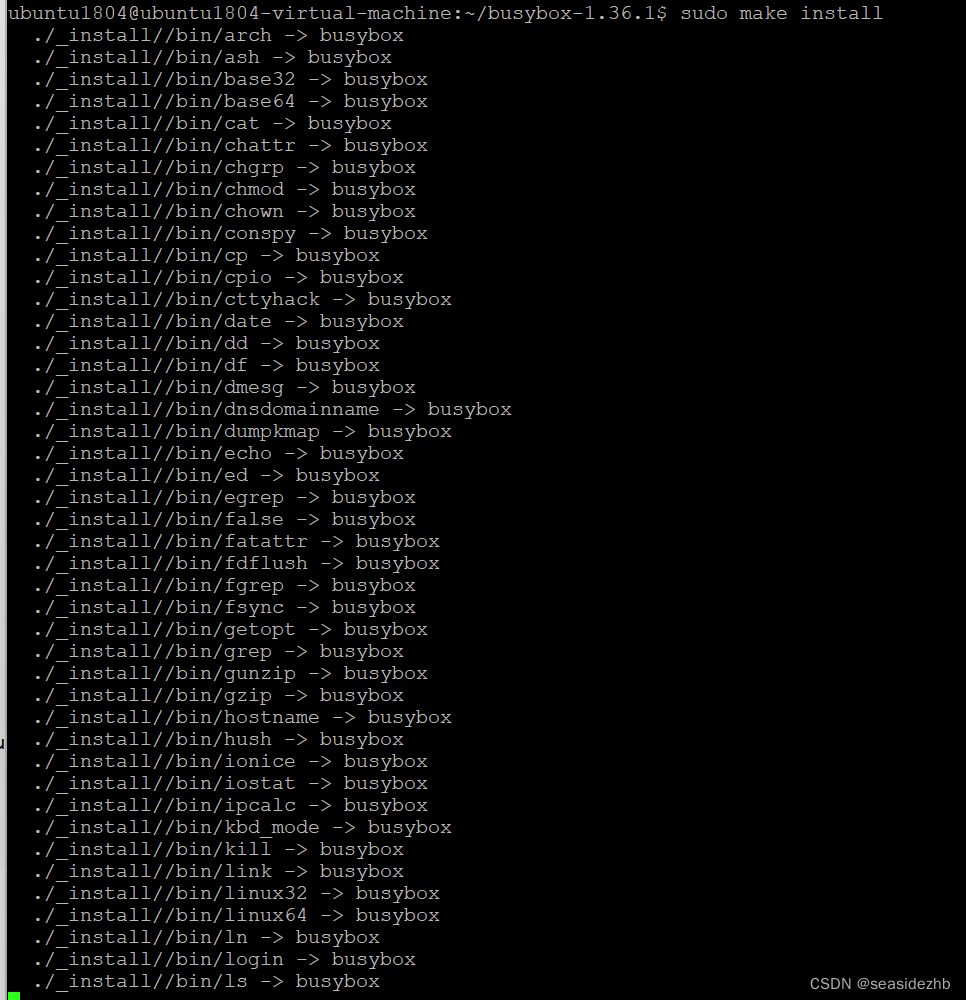
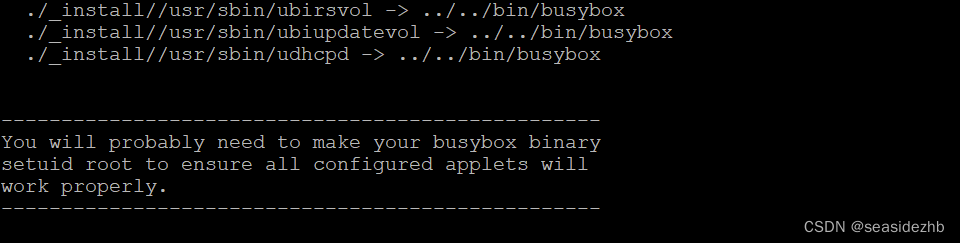
sudo make install进行安装。
完成之后,提示:
You will probably need to make your busybox binary
setuid root to ensure all configured applets will
work properly.
启动内存文件系统制作
cd _install进入到特定目录里边。

sudo mkdir proc sys新建两个目录proc和sys

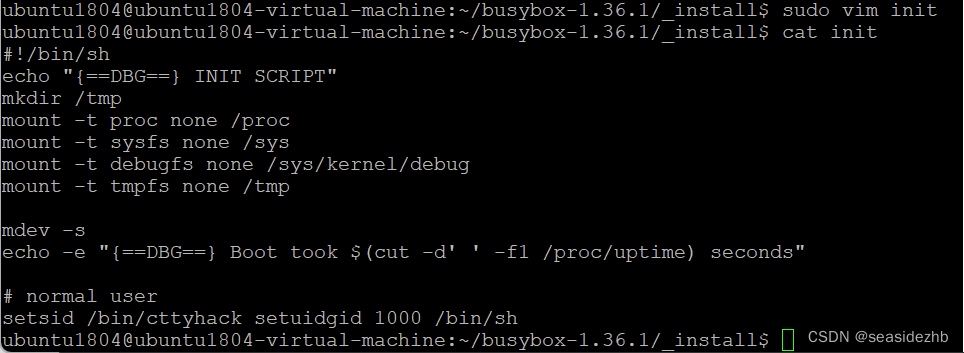
sudo vim init把下边的内容写进去:
#!/bin/sh
echo "{==DBG==} INIT SCRIPT"
mkdir /tmp
mount -t proc none /proc
mount -t sysfs none /sys
mount -t debugfs none /sys/kernel/debug
mount -t tmpfs none /tmpmdev -s
echo -e "{==DBG==} Boot took $(cut -d' ' -f1 /proc/uptime) seconds"# normal user
setsid /bin/cttyhack setuidgid 1000 /bin/sh
sudo chmod +x init 为当前用户添加上可执行的权限。

sudo chmod -R 777 .给当前目录中所有的文件配上读写执行的权限。

sudo find . | sudo cpio -o --format=newc > ./rootfs.img生成rootfs.img文件。

生成Linux内核
cd ~/进入到home目录里边。

sudo wget http://ftp.sjtu.edu.cn/sites/ftp.kernel.org/pub/linux/kernel/v5.x/linux-5.19.tar.xz下载源代码。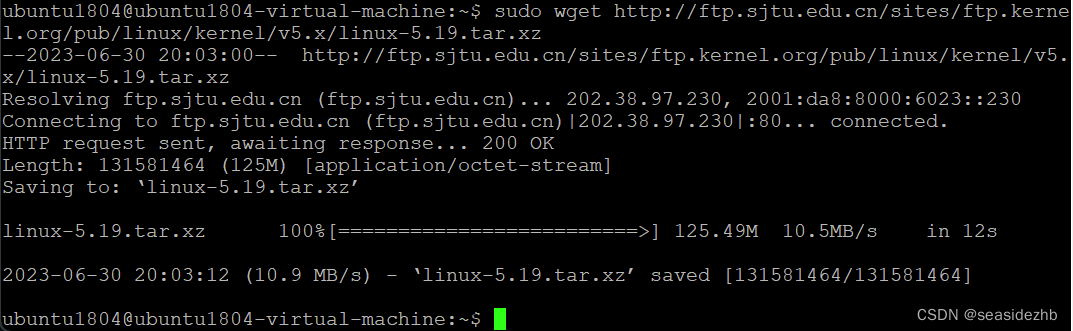
sudo tar xf linux-5.19.tar.xz解压源代码,时间有点长,需要等待。

cd linux-5.19/进入到源码里边。

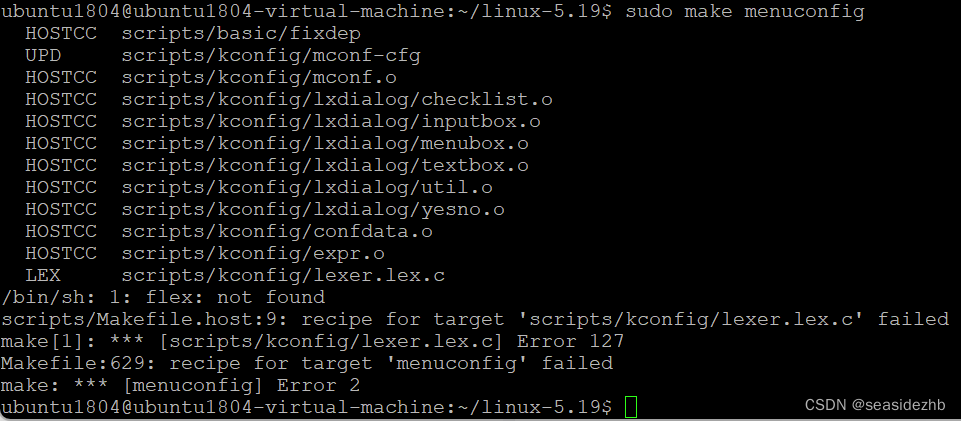
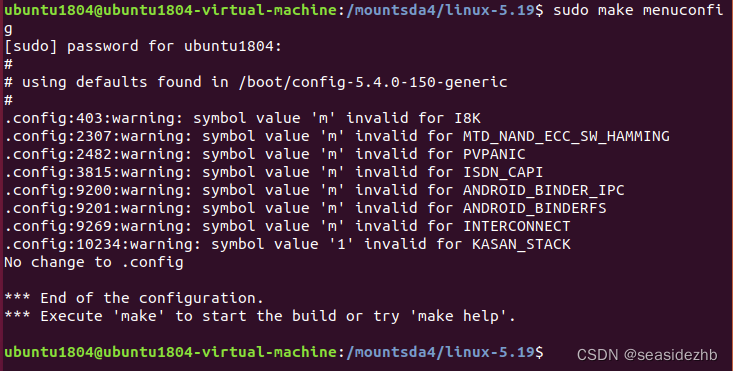
sudo make menuconfig,发现报错:
/bin/sh: 1: flex: not found
scripts/Makefile.host:9: recipe for target 'scripts/kconfig/lexer.lex.c' failed
make[1]: *** [scripts/kconfig/lexer.lex.c] Error 127
Makefile:629: recipe for target 'menuconfig' failed
make: *** [menuconfig] Error 2
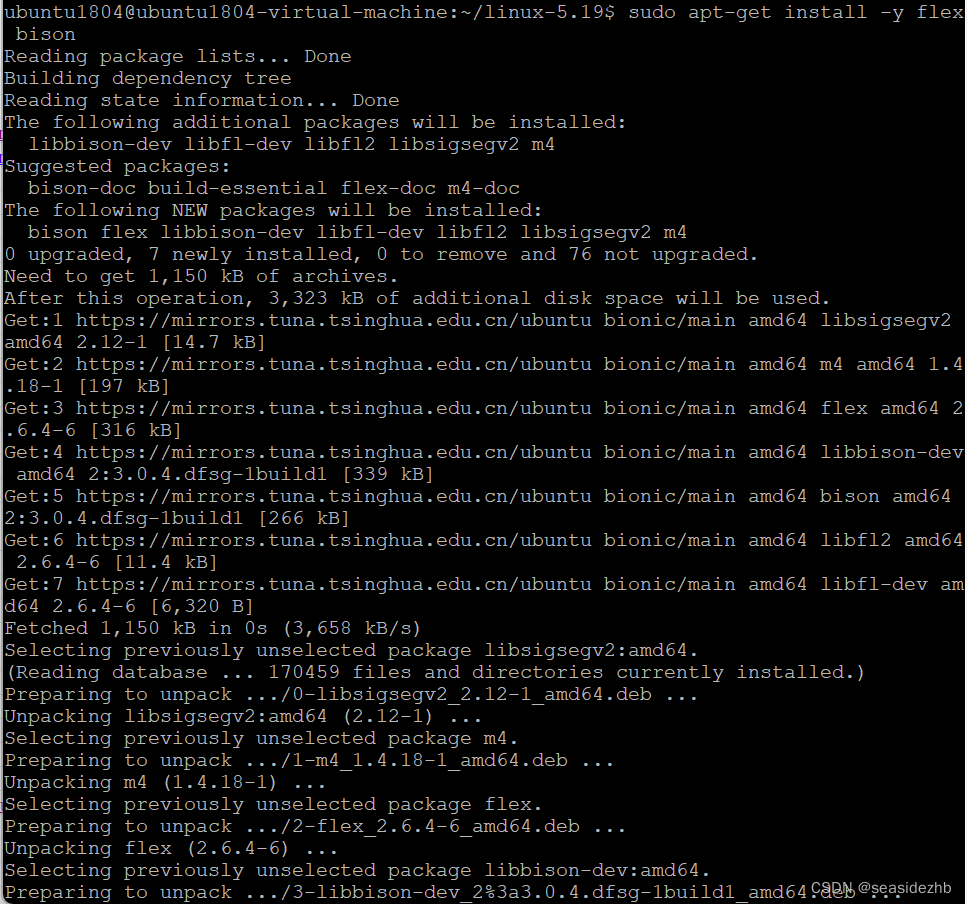
sudo apt-get install -y flex bison安装依赖包。
sudo make menuconfig进行配置选择。
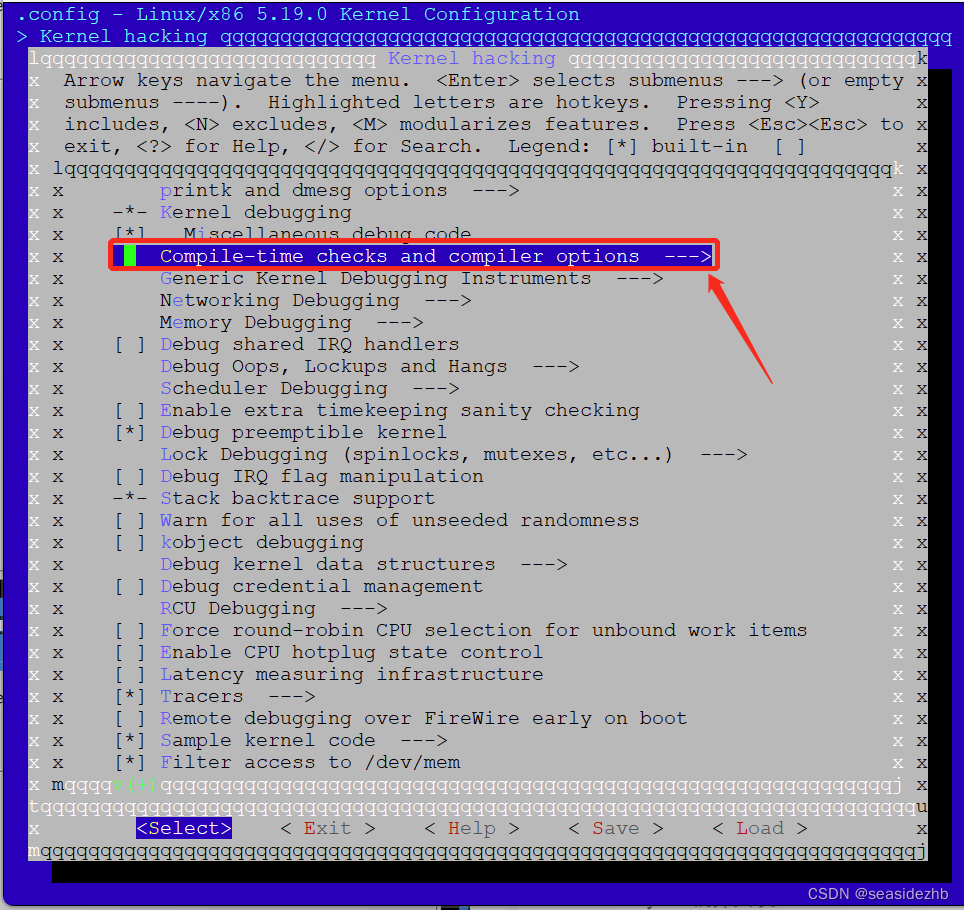
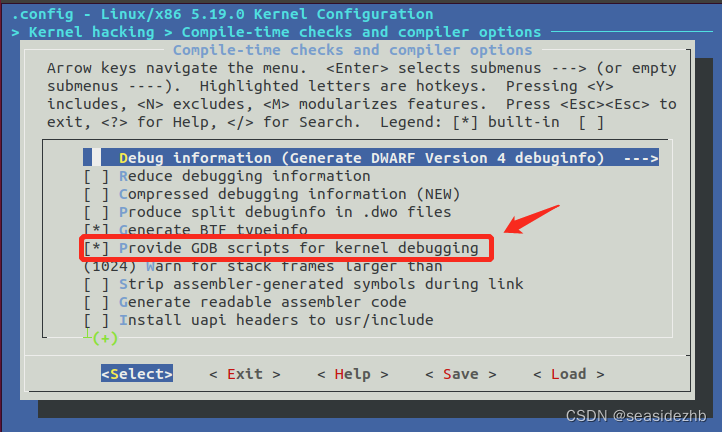
上下键可以进行选项寻找,按回车键可以进入,找到Kernel hacking进入。

使用下键找到Compile-time checks and compiler options,然后按回车键。
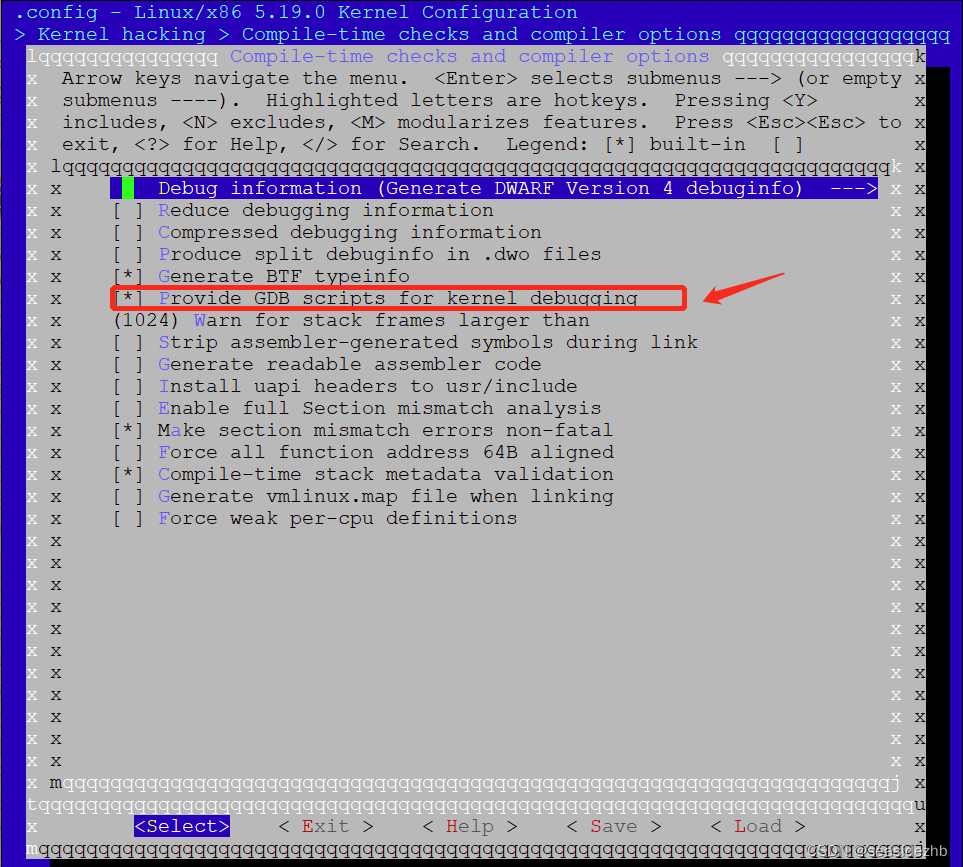
发现Provide GDB scripts for kernel debugging已经默认选上了。
按两下Esc
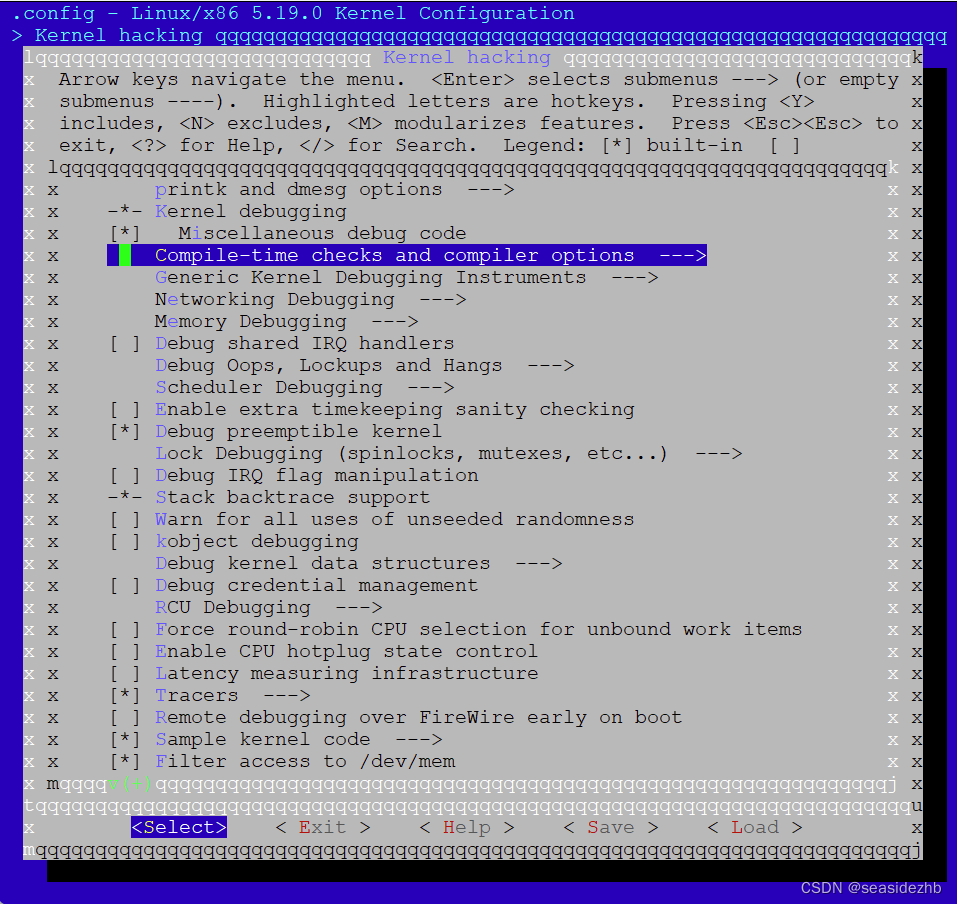
按两下Esc
按两下Esc
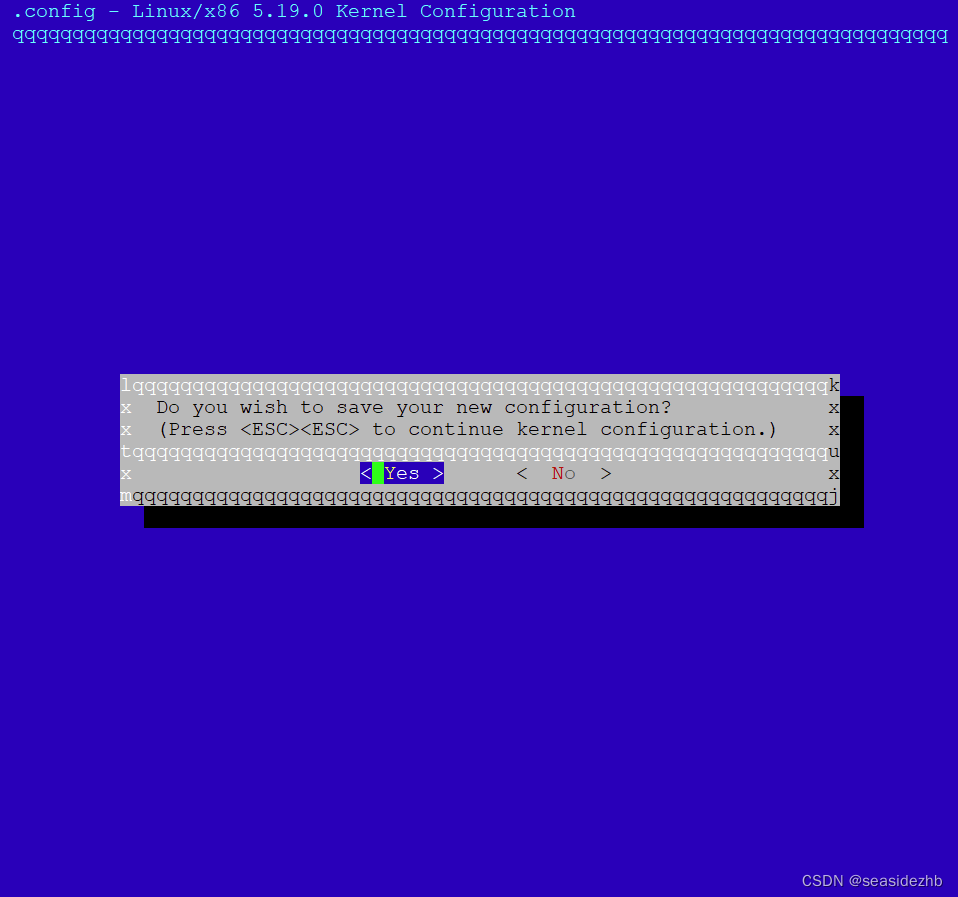
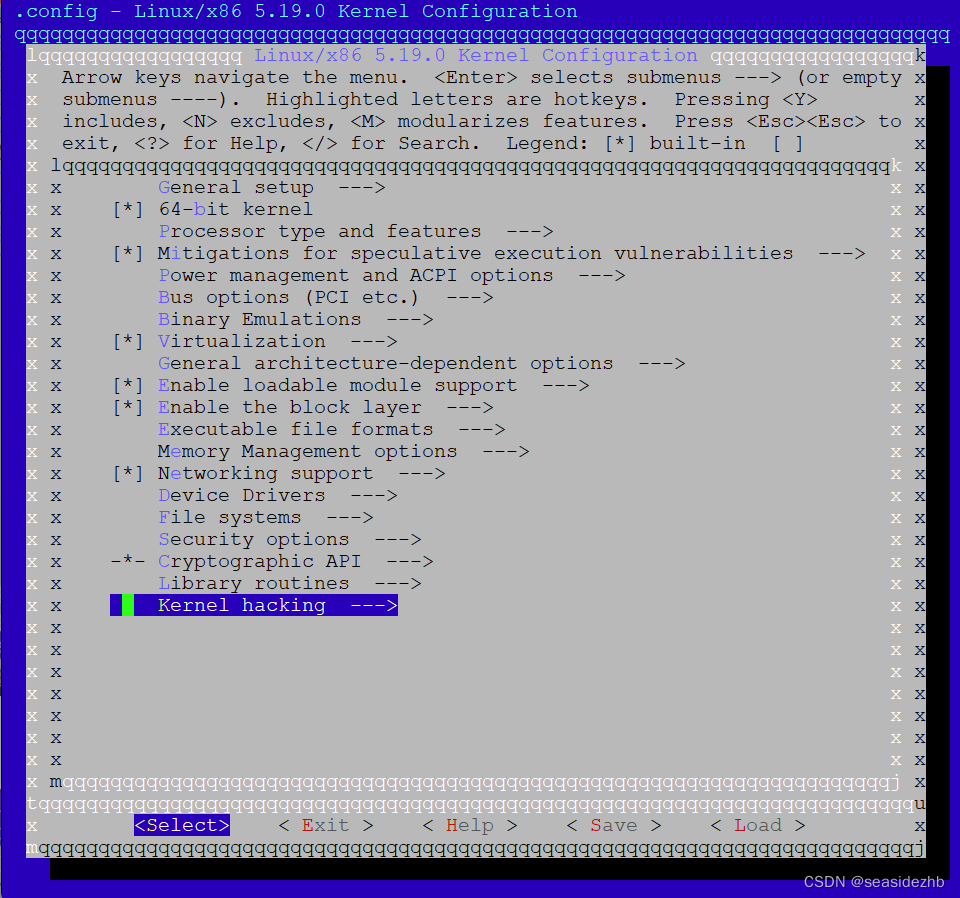
选择yes按一下回车键。

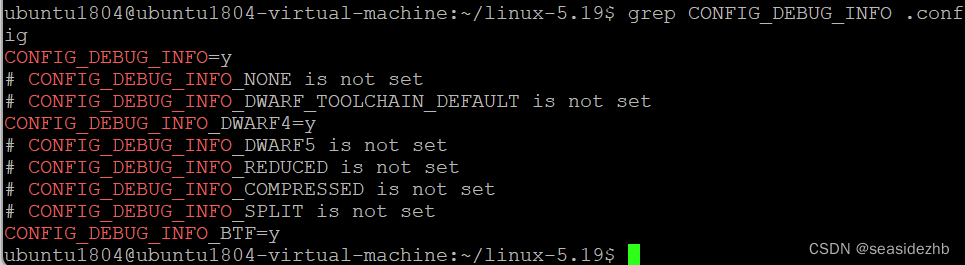
grep CONFIG_DEBUG_INFO .config验证一下,选择是否正确。
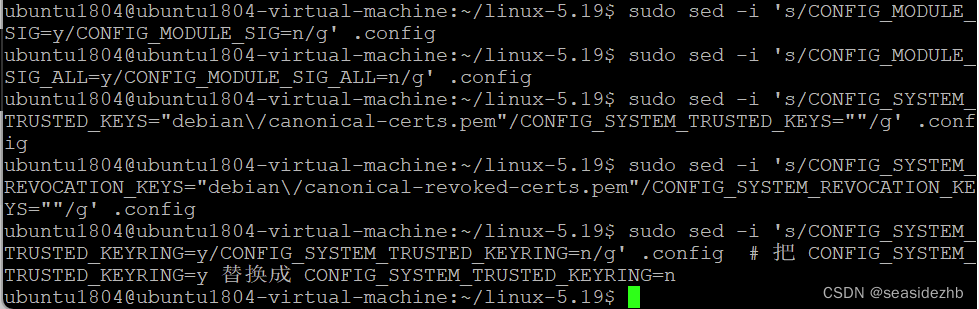
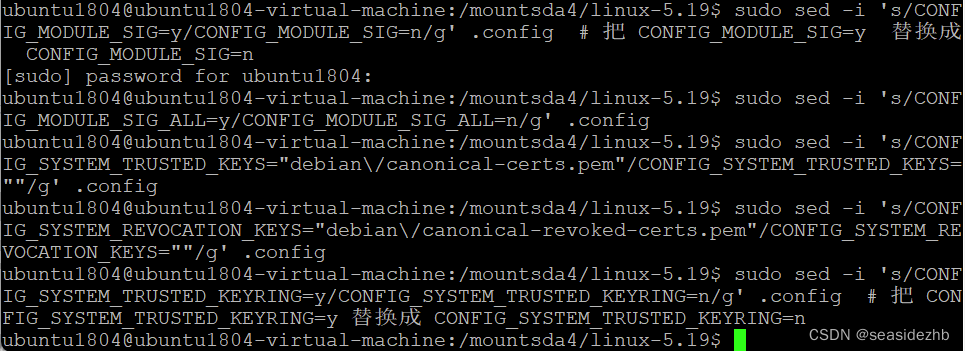
sudo sed -i 's/CONFIG_MODULE_SIG=y/CONFIG_MODULE_SIG=n/g' .config  # 把 CONFIG_MODULE_SIG=y  替换成  CONFIG_MODULE_SIG=n
sudo sed -i 's/CONFIG_MODULE_SIG_ALL=y/CONFIG_MODULE_SIG_ALL=n/g' .config
sudo sed -i 's/CONFIG_SYSTEM_TRUSTED_KEYS="debian\/canonical-certs.pem"/CONFIG_SYSTEM_TRUSTED_KEYS=""/g' .config
sudo sed -i 's/CONFIG_SYSTEM_REVOCATION_KEYS="debian\/canonical-revoked-certs.pem"/CONFIG_SYSTEM_REVOCATION_KEYS=""/g' .config
sudo sed -i 's/CONFIG_SYSTEM_TRUSTED_KEYRING=y/CONFIG_SYSTEM_TRUSTED_KEYRING=n/g' .config  # 把 CONFIG_SYSTEM_TRUSTED_KEYRING=y 替换成 CONFIG_SYSTEM_TRUSTED_KEYRING=n
cat .config | grep "CONFIG_SYSTEM_TRUSTED_KEYRING=n" # 看一下 CONFIG_SYSTEM_TRUSTED_KEYRING 相关字符串是否成功替换。
nproc看一下当前系统核数。

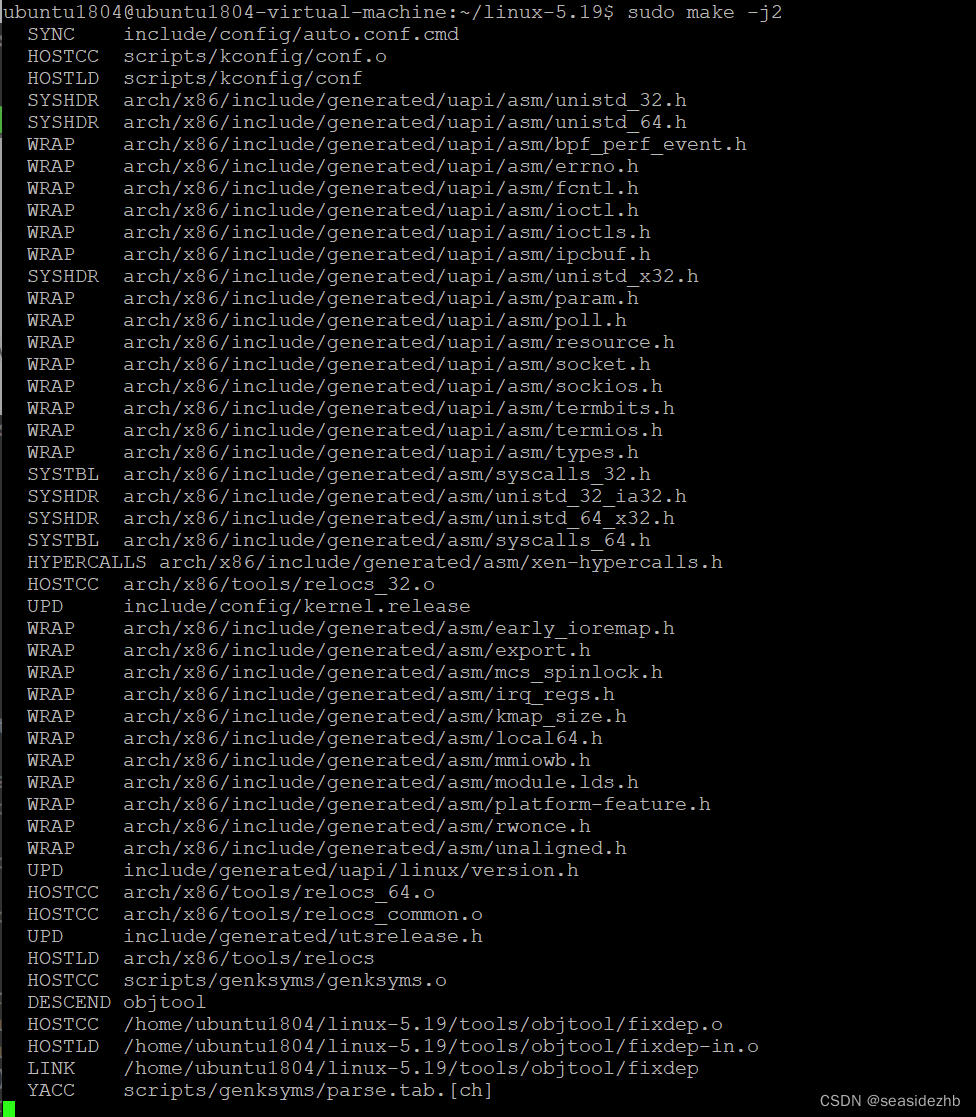
sudo make -j2开始编译
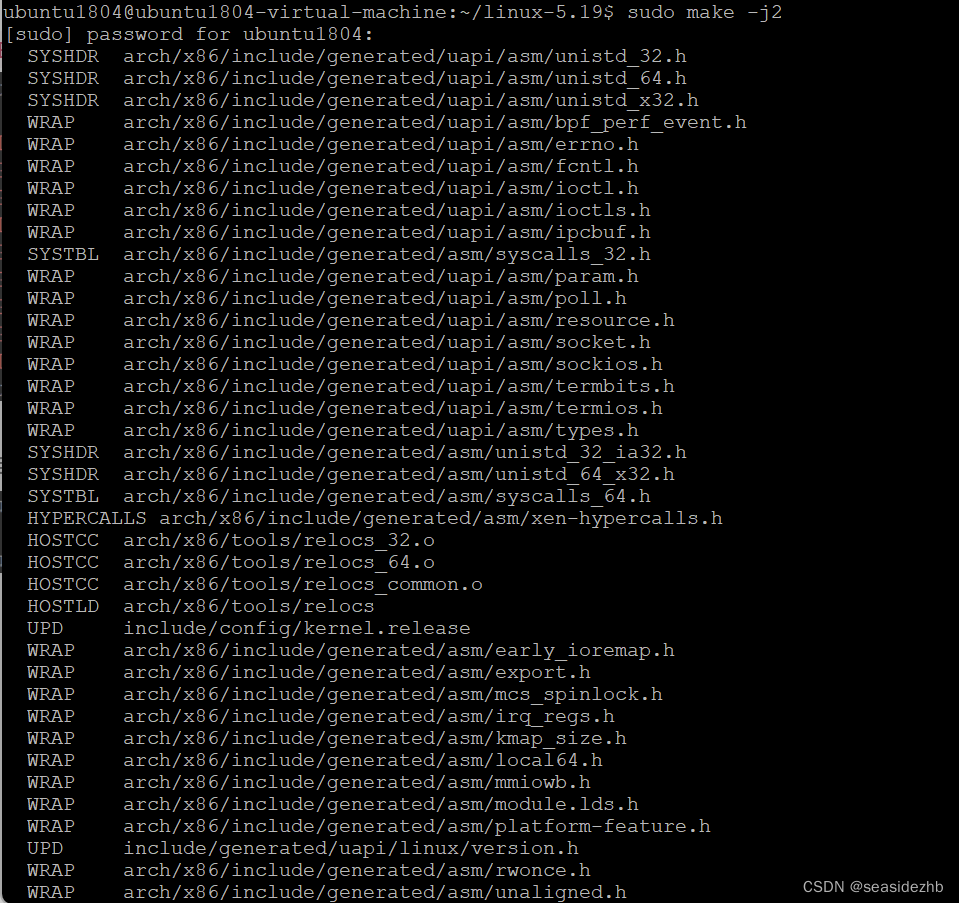
发现报错:
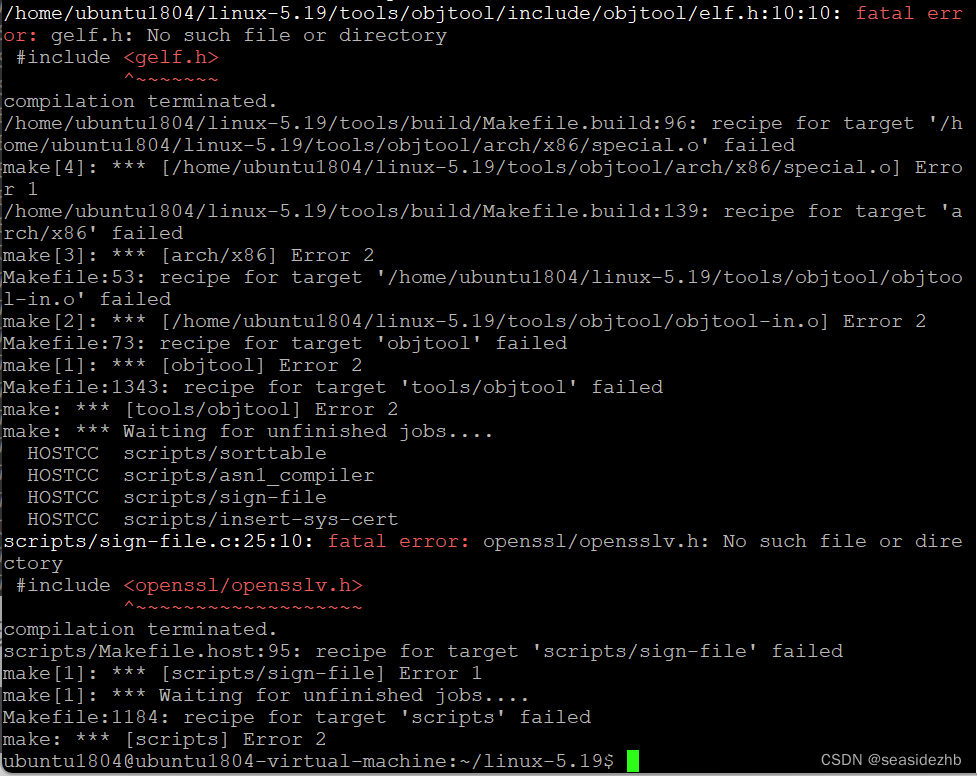
/home/ubuntu1804/linux-5.19/tools/objtool/include/objtool/elf.h:10:10: fatal err or: gelf.h: No such file or directory#include <gelf.h>^~~~~~~~
compilation terminated.
/home/ubuntu1804/linux-5.19/tools/build/Makefile.build:96: recipe for target '/h ome/ubuntu1804/linux-5.19/tools/objtool/arch/x86/special.o' failed
make[4]: *** [/home/ubuntu1804/linux-5.19/tools/objtool/arch/x86/special.o] Erro r 1
/home/ubuntu1804/linux-5.19/tools/build/Makefile.build:139: recipe for target 'a rch/x86' failed
make[3]: *** [arch/x86] Error 2
Makefile:53: recipe for target '/home/ubuntu1804/linux-5.19/tools/objtool/objtoo l-in.o' failed
make[2]: *** [/home/ubuntu1804/linux-5.19/tools/objtool/objtool-in.o] Error 2
Makefile:73: recipe for target 'objtool' failed
make[1]: *** [objtool] Error 2
Makefile:1343: recipe for target 'tools/objtool' failed
make: *** [tools/objtool] Error 2
make: *** Waiting for unfinished jobs....HOSTCC  scripts/sorttableHOSTCC  scripts/asn1_compilerHOSTCC  scripts/sign-fileHOSTCC  scripts/insert-sys-cert
scripts/sign-file.c:25:10: fatal error: openssl/opensslv.h: No such file or dire ctory#include <openssl/opensslv.h>^~~~~~~~~~~~~~~~~~~~
compilation terminated.
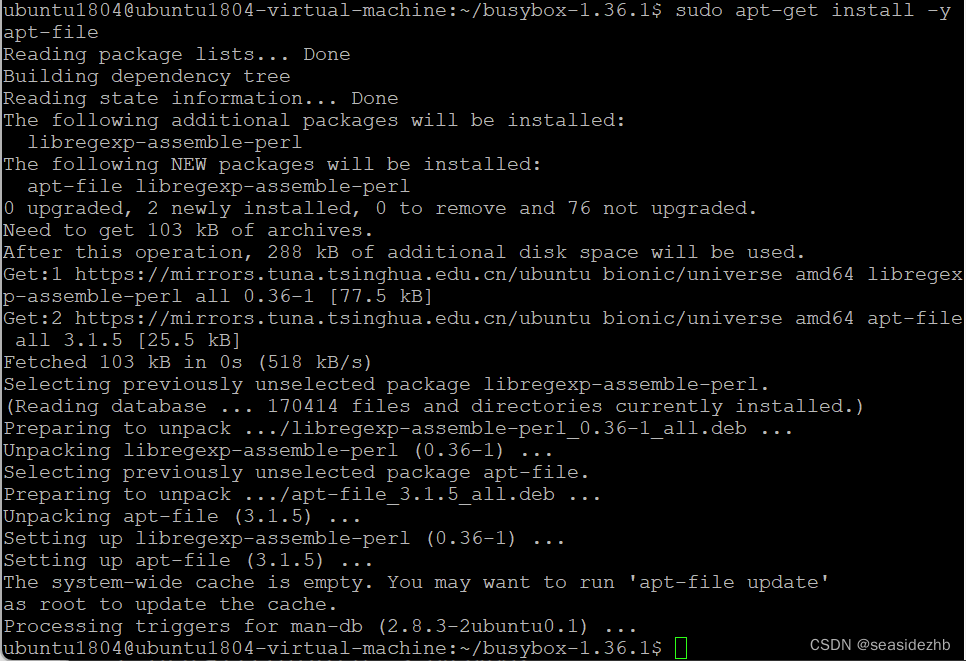
sudo apt-get install -y apt-file安装apt-file。
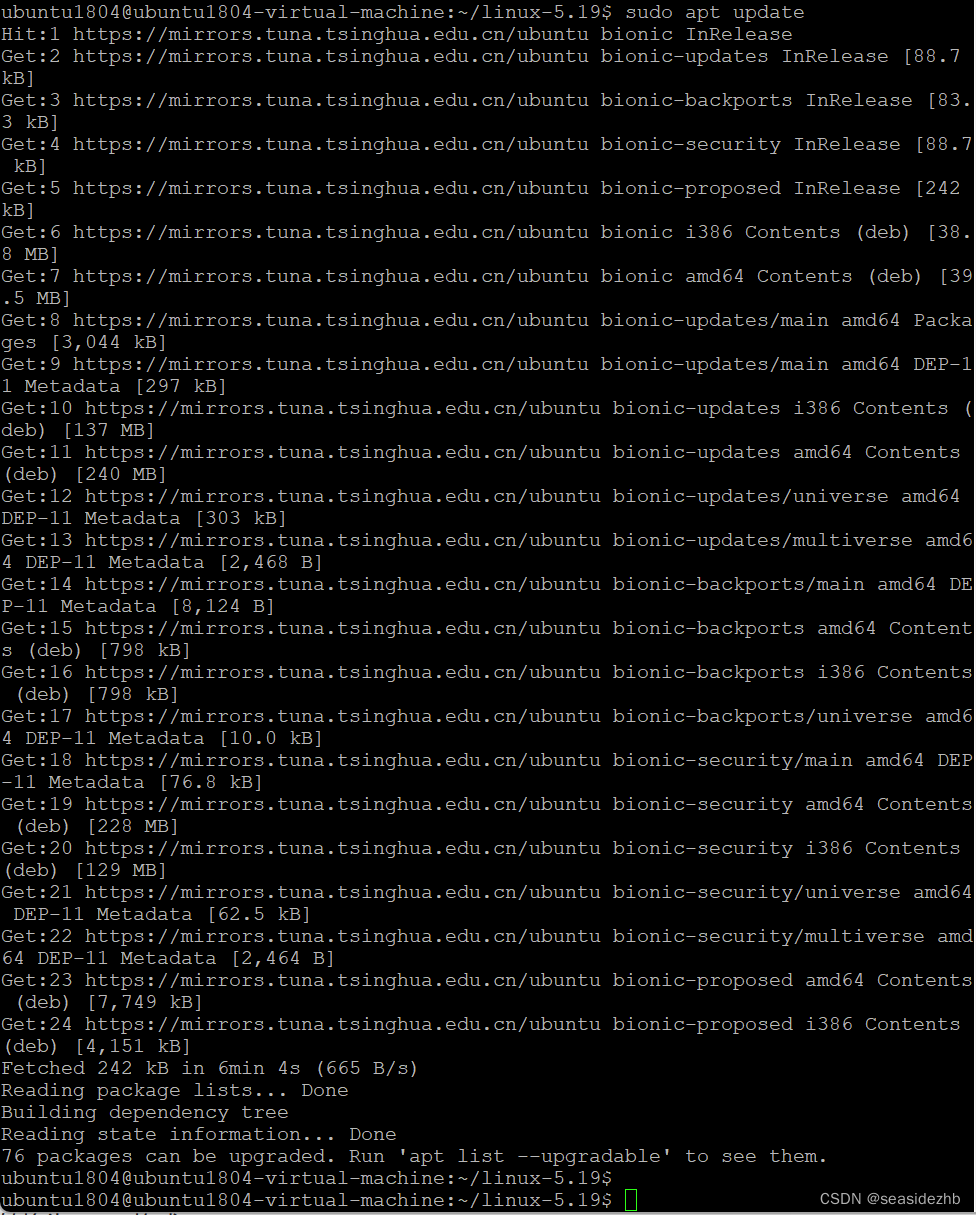
sudo apt-file search gelf.h,提示 The cache is empty. You need to run "apt update" first.,然后执行sudo apt update。
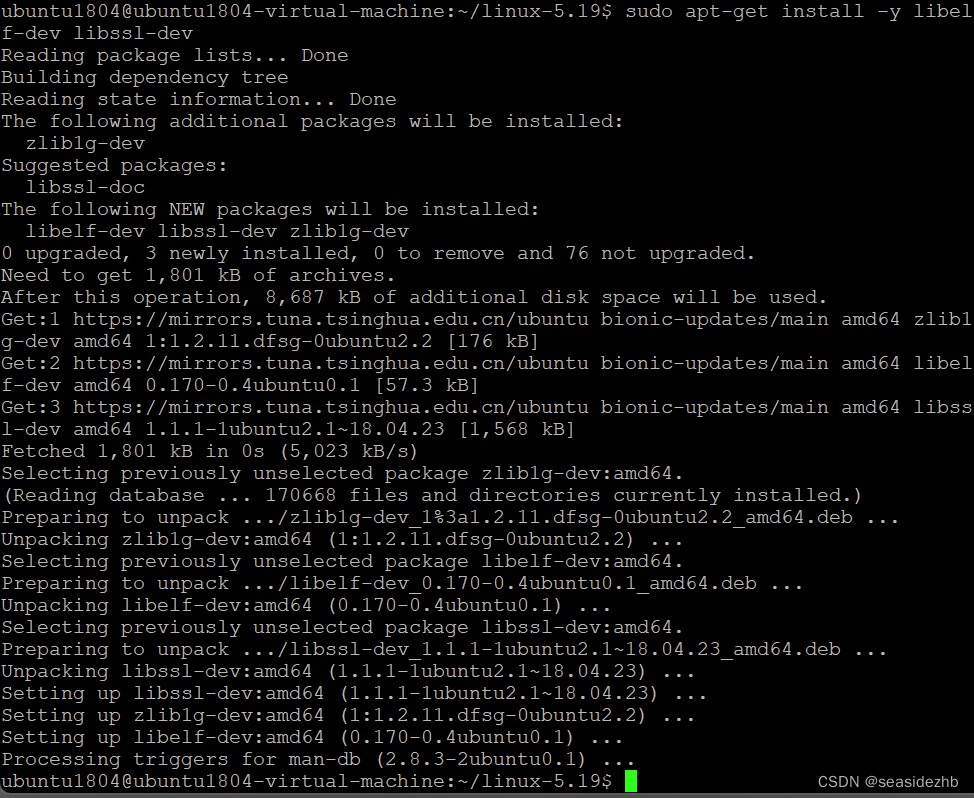
sudo apt-file search gelf.h找了许久,才找到。

我看还不如直接上网搜索比较快,sudo apt-get install -y libelf-dev libssl-dev安装依赖包。
sudo make -j2编译
报错如下:
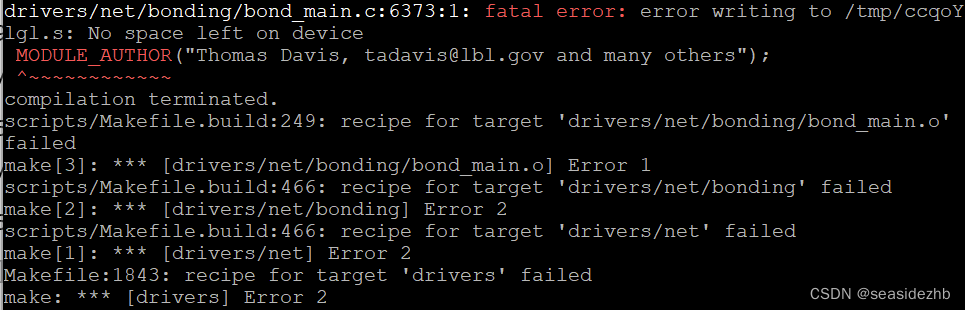
make[3]: *** [drivers/net/bonding/bond_3ad.o] Error 1
make[3]: *** Waiting for unfinished jobs....
drivers/net/bonding/bond_main.c:6373:1: fatal error: error writing to /tmp/ccqoYlgl.s: No space left on deviceMODULE_AUTHOR("Thomas Davis, tadavis@lbl.gov and many others");^~~~~~~~~~~~~
compilation terminated.
scripts/Makefile.build:249: recipe for target 'drivers/net/bonding/bond_main.o' failed
make[3]: *** [drivers/net/bonding/bond_main.o] Error 1
scripts/Makefile.build:466: recipe for target 'drivers/net/bonding' failed
make[2]: *** [drivers/net/bonding] Error 2
scripts/Makefile.build:466: recipe for target 'drivers/net' failed
make[1]: *** [drivers/net] Error 2
Makefile:1843: recipe for target 'drivers' failed
make: *** [drivers] Error 2
sudo rm -rf /tmp删除/tmp里边的内容。

然后再次执行sudo make -j2编译,这次发现是整个Ubuntu系统磁盘满了,开机之后再也无法进入Ubuntu了,所以只能进入到grub中recover模式删除原先编译好的文件,才能进入到系统。然后使用vmware扩展磁盘大小,然后再进行挂载。

sudo make menuconfig进行配置选择。
已经默认选择上了。
重新配置一些参数。
sudo sed -i 's/CONFIG_MODULE_SIG=y/CONFIG_MODULE_SIG=n/g' .config  # 把 CONFIG_MODULE_SIG=y  替换成  CONFIG_MODULE_SIG=n
sudo sed -i 's/CONFIG_MODULE_SIG_ALL=y/CONFIG_MODULE_SIG_ALL=n/g' .config
sudo sed -i 's/CONFIG_SYSTEM_TRUSTED_KEYS="debian\/canonical-certs.pem"/CONFIG_SYSTEM_TRUSTED_KEYS=""/g' .config
sudo sed -i 's/CONFIG_SYSTEM_REVOCATION_KEYS="debian\/canonical-revoked-certs.pem"/CONFIG_SYSTEM_REVOCATION_KEYS=""/g' .config
sudo sed -i 's/CONFIG_SYSTEM_TRUSTED_KEYRING=y/CONFIG_SYSTEM_TRUSTED_KEYRING=n/g' .config  # 把 CONFIG_SYSTEM_TRUSTED_KEYRING=y 替换成 CONFIG_SYSTEM_TRUSTED_KEYRING=n
cat .config | grep "CONFIG_SYSTEM_TRUSTED_KEYRING=n" # 看一下 CONFIG_SYSTEM_TRUSTED_KEYRING 相关字符串是否成功替换。
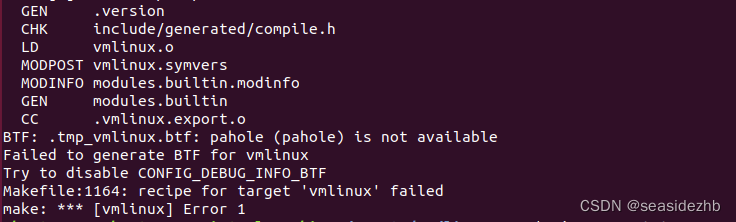
sudo make -j2

发现报错如下:
BTF: .tmp_vmlinux.btf: pahole (pahole) is not available
Failed to generate BTF for vmlinux
Try to disable CONFIG_DEBUG_INFO_BTF
Makefile:1164: recipe for target 'vmlinux' failed
make: *** [vmlinux] Error 1
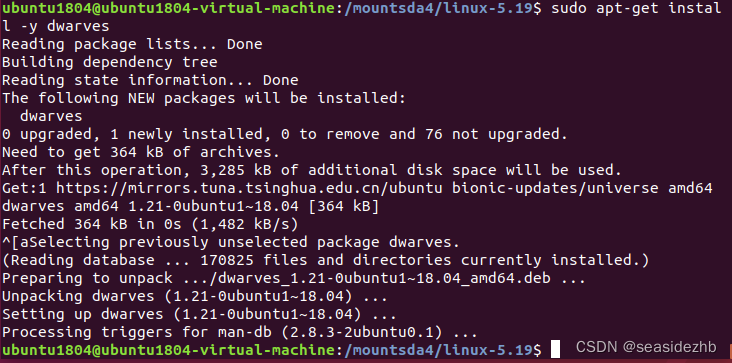
sudo apt-get install -y dwarves安装dwarves。
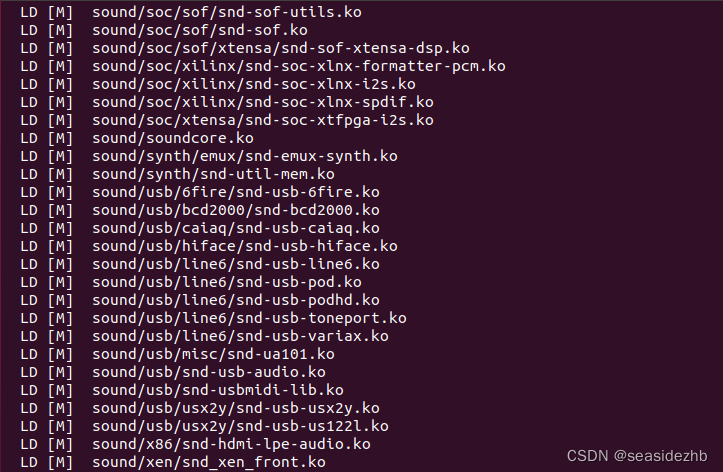
sudo make -j2再次执行。

完成之后如下:
ls -hl vmlinux可以看到生成的vmlinux文件信息。

ls -hl ./arch/x86/boot/bzImage可以看到生成的bzImage文件信息。

安装Qmeu并开始调试
sudo apt install -y qemu qemu-utils qemu-kvm virt-manager libvirt-daemon-system libvirt-clients bridge-utils安装依赖包。

sudo cp ~/busybox-1.36.1/_install/rootfs.img /mountsda4/linux-5.19/将rootfs.img移动到源代码目录下。

sudo qemu-system-x86_64 -kernel ./arch/x86/boot/bzImage -initrd ./rootfs.img -append "nokaslr console=ttyS0" -s -S -nographic,可以看到停留在启动处。

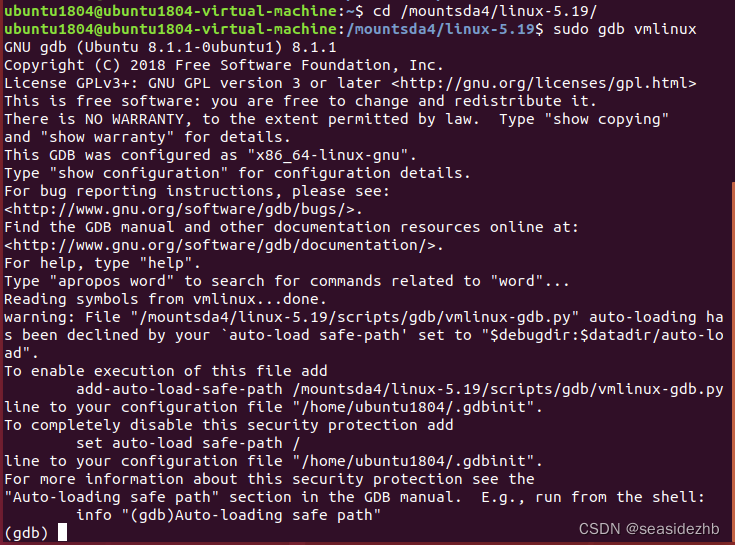
再打开一个命令行,称之为B终端,cd /mountsda4/linux-5.19进入到vmlinux文件所在的目录下,然后执行sudo gdb vmlinux,就可以进入到gdb测试界面。
之后输入target remote localhost:1234连接上测试端口。

之后的测试就需要使用gdb测试里边的知识了。