h5在线网站建设杭州seo博客有哪些
所在前面的话,我是个前端小白,大佬请绕行,可能大佬觉得很简单,但是我真的花了好几个小时去解决,所以记录一下,下次也可以作为参考。
我主要是以第二种方式进行修改的
开门见山
简述问题:大家都知道,Redis集群类型可分为Master-Slave和Cluster两种类型,而Master-Slave是实例,Cluster为分片。由于展示字段方面也一样,那么问题来了,如何在一个界面里面展示
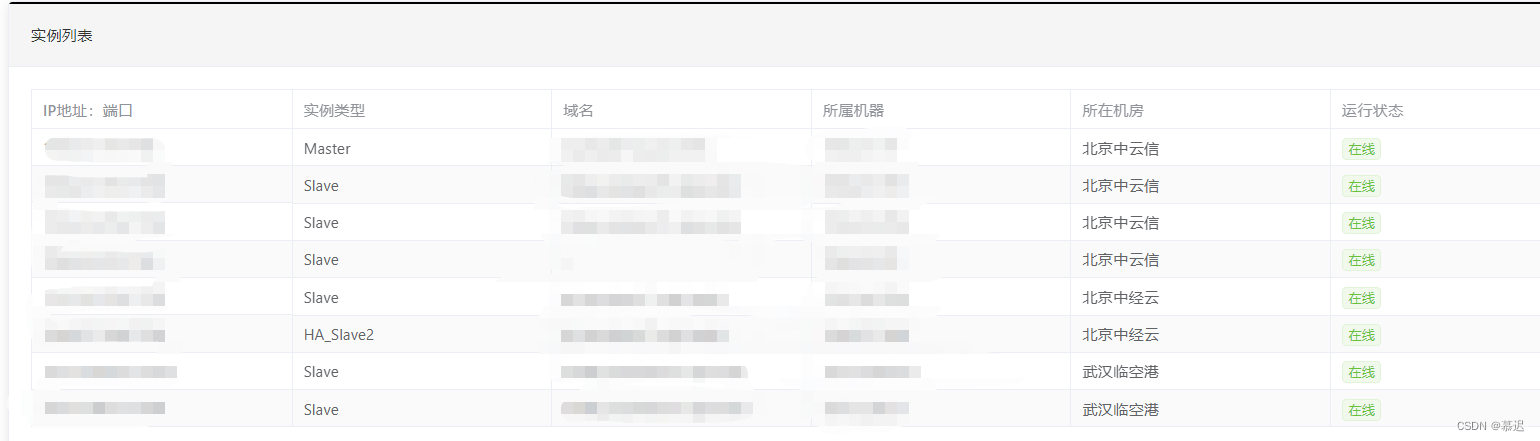
先简单展示下效果
这是Master-Slave界面的展示效果
这是Cluster界面的展示效果
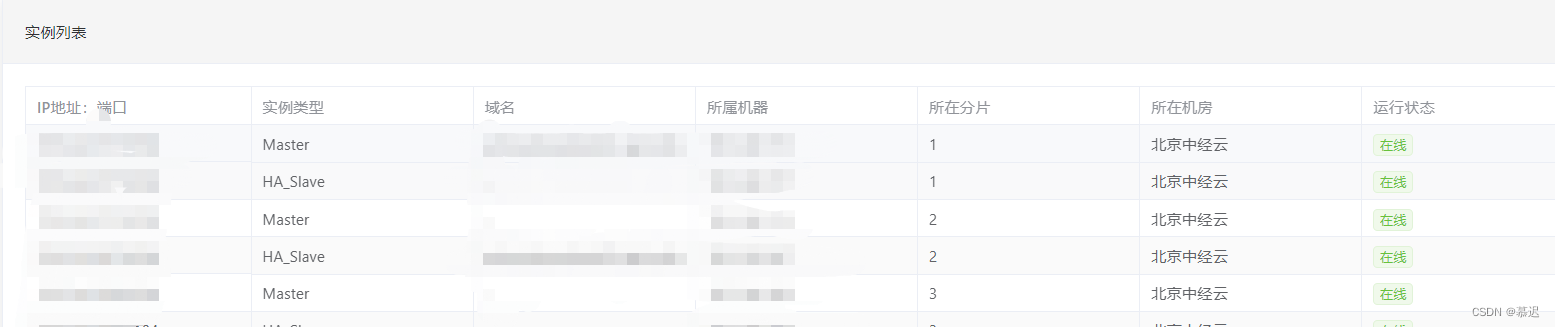
我们大概率也不会做两个界面,那么如何在一个界面里面实现这种效果呢
实现方式一 : el-table el-table-column 形式
要在 Vue 中的动态表格中添加数据列,并通过字段控制显示和隐藏,可以按照以下步骤进行:
1、在表格中添加要动态添加的列,例如:
<el-table :data="tableData" style="width: 100%"><el-table-column prop="date" label="日期" width="180"></el-table-column><el-table-column prop="name" label="姓名" width="180"></el-table-column><!-- 定义名为 "newColumn" 的插槽,用于动态添加数据列 --><template v-slot:newColumn="{ row }"><!-- 根据 row 对象中的字段来判断是否显示此列 --><el-table-column v-if="row.showNewColumn" prop="newColumn" label="新数据列" width="180"></el-table-column></template><el-table-column prop="address" label="地址"></el-table-column><el-table-column fixed="right" label="操作" width="100"><template v-slot="scope"><el-button @click="handleEdit(scope.$index, scope.row)">编辑</el-button><el-button @click="handleDelete(scope.$index, scope.row)">删除</el-button></template></el-table-column>
</el-table>
在上面的代码中,我们定义了一个名为 “newColumn” 的插槽,并在其中添加了一个数据列,该数据列的显示与否取决于当前行数据中的 showNewColumn 字段。
2、在表格数据中添加相应的字段和数据,例如:
data() {return {tableData: [{date: '2023-04-11',name: '张三',newColumn: '这是一列新数据',showNewColumn: true,address: '上海市普陀区金沙江路 1518 弄',},{date: '2023-04-12',name: '李四',newColumn: '',showNewColumn: false,address: '上海市普陀区金沙江路 1517 弄',},// ...]}
}
在上面的代码中,我们在表格数据中添加了一个 newColumn 字段,以及一个 showNewColumn 字段来控制该数据列的显示与否。
3、在需要动态添加数据列的地方,通过修改 showNewColumn 字段来控制数据列的显示与否,例如:
methods: {// 添加新的数据列addNewColumn(index) {this.tableData[index].newColumn = '这是一列新数据';this.tableData[index].showNewColumn = true;},// 删除数据列removeNewColumn(index) {this.tableData[index].newColumn = '';this.tableData[index].showNewColumn = false;},// ...
}
在上面的代码中,我们通过修改 showNewColumn 字段来控制数据列的显示与否,从而实现了在中间位置添加数据列,并通过字段控制显示和隐藏的效果。
实现方式二 非el-table 方式
这种方式的
{prop: "name",label: "IP地址:端口",fixed: true,minWidth: "120",align: "left",},
实现如下
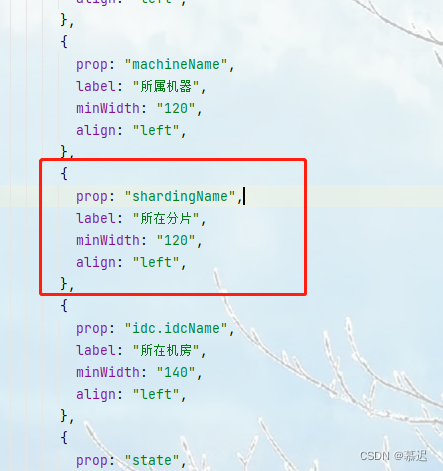
1、首先在代码里面添加我们想要的列,截图如下
具体代码如下
instanceTitle: {RedisInstances: "实例列表",RedisSentinel: "Sentinel列表",},instances: {RedisInstances: [],RedisSentinel: [],},
instanceProp: {RedisInstances: [{prop: "name",label: "IP地址:端口",fixed: true,minWidth: "120",align: "left",},{prop: "role",label: "实例类型",minWidth: "120",align: "left",},{prop: "domainName",label: "域名",minWidth: "150",align: "left",},{prop: "machineName",label: "所属机器",minWidth: "120",align: "left",},{prop: "shardingName",label: "所在分片",minWidth: "120",align: "left",},{prop: "idc.idcName",label: "所在机房",minWidth: "140",align: "left",},{prop: "state",label: "运行状态",minWidth: "100",align: "left",},],RedisSentinel: [{prop: "name",label: "名称",fixed: true,minWidth: "120",align: "left",},{prop: "idcName",label: "所在机房",minWidth: "140",align: "left",},{prop: "state",label: "运行状态",minWidth: "100",align: "left",},],},
2、找到对应的el-table 父组件,我得截图如下

具体代码如下:
<el-rowclass="cluster-basic-info-body-row"v-for="(ins, key) in instanceProp":key="key"><el-card class="box-card" v-if="clusterInfo.mode != ':qae'"><div slot="header"><span>{{ instanceTitle[key] }}</span></div><el-table :data="instances[key]" stripe border max-height="500"><el-table-columnv-for="(item, index) in ins":key="index":prop="item.prop":label="item.label":fixed="item.fixed":min-width="item.shardingName == null ? 0 : item.minWidth":align="item.align"><template slot-scope="{ row, column }"><el-tagv-if="column.property === 'state'":type="row.state === ':online' ? 'success' : 'warning'"size="mini">{{ util.formatEnumeration(null, null, row.state===':online'?"在线":"下线") }}</el-tag><!-- <span v-else-if="row.shardingName == null">{{ this.$set(column, 'minWidth', 0) }}</span>--><span v-else-if="column.property === 'role'">{{ util.formatEnumeration(null, null, row.role) }}</span><span v-else v-html="util.getColumnValue(row, column.property)"></span></template></el-table-column></el-table></el-card></el-row>
代码解析如下:
主要是使用了 v-for 指令和条件渲染的 v-if 指令来生成一个包含多个 el-card 组件的 el-row 组件。
具体来说,v-for=“(ins, key) in instanceProp” 表示遍历 instanceProp 对象的属性,将每个属性的键值作为循环变量 key,每个属性的值作为循环变量 ins,然后根据这些变量来渲染组件。
v-if=“clusterInfo.mode != ‘:qae’” 表示只有当 clusterInfo.mode 不等于 ‘:qae’ 时才渲染 el-card 组件,即根据不同的数据来动态生成不同的组件。
在 el-card 组件中,使用了 v-for=“(item, index) in ins” 来遍历 ins 对象的属性,将每个属性的键值作为循环变量 index,每个属性的值作为循环变量 item,然后根据这些变量来渲染 el-table-column 组件。
el-table-column 组件中的各个属性用于配置列的显示方式,例如 :prop=“item.prop” 表示该列对应数据对象的属性名,:label=“item.label” 表示该列的表头标题,:fixed=“item.fixed” 表示该列是否固定,:min-width=“item.shardingName == null ? 0 : item.minWidth” 表示该列的最小宽度,:align=“item.align” 表示该列的文本对齐方式。
在 el-table-column 组件中,使用了 template 标签来定义列的内容模板,使用 slot-scope 属性来指定模板的作用域。在模板中,使用了 v-if 和 v-else-if 来根据列的属性值动态生成不同的内容,例如 v-if=“column.property === ‘state’” 表示当列的属性为 state 时,使用 el-tag 组件来显示状态信息。
最后,整个代码块包含在 el-row 组件中,使用了 :key 属性来指定组件的唯一标识。
3、代码主要修改实现如下:
<el-table-columnv-for="(item, index) in ins":key="index":prop="item.prop":label="item.label":fixed="item.fixed":min-width="item.minWidth":align="item.align">
改为
<el-table-columnv-for="(item, index) in ins":key="index":prop="item.prop":label="item.label":fixed="item.fixed":min-width="item.shardingName == null ? 0 : item.minWidth":align="item.align"v-if="item.prop !== 'shardingName' || item.prop === 'shardingName' && instances[key][0].shardingName !== null">
总结:
1、我主要修改的是第二方式,身为小白我不敢乱动之前的代码,所以只能在代码的基础上进行改动
2、将 ··· :min-width=“item.minWidth”··· 改为 :min-width=“item.shardingName == null ? 0 : item.minWidth”
3、在最后添加v-if 判断 v-if=“item.prop !== ‘shardingName’ || item.prop === ‘shardingName’ && instances[key][0].shardingName !== null”
结语
真的好简单呀,但不会就是不会,淦